Useful Info

Acasă Useful Info
In the useful info / information section we discuss all the useful things and interesting information from the automotive aftermarket market - information that will help you make the best decision on your next visit to a car service.

How much does it cost to paint a car element?

0
pretul vopsire element masina

Disclaimer – Our price analysis is based on the Romanian market. The cost in other countries may be lower or higher depending on the income. If we refer to the prices in Western Europe, the cost is higher than in Romania because the labor costs are also higher. Thus began to appear businesses that send cars to paint in Romania, then these cars return and are sold in the market where they left. Thus, these services can have a higher profit margin.

In 2017 we wrote an article about the price per item at the paint shop. The article had over 73,000 views and over 30 comments on the article. Next, the drivers want to know what the tariffs are in 2022, for this reason, we said to renew the subject, to update it with the new market prices.

So what are the prices?

If in 2017 the price per element was between 50 Euro and 100 Euro with a classic paint, in 2022 the prices start from 100 Euro and go up to over 200 Euro depending on the size of the painted element. Here, depending on the color, metallic paint is more expensive than a classic one and involves other painting techniques.

In 5 years, the price per item has doubled. It is necessary to take into account the final price and the type of service where the car arrives, in the dealership the prices are a little higher.

How do we choose the service for repainting?

Most follow the recommendations, some choose to read reviews on the internet and there are also those who take the car directly to the dealership. It’s just a matter of choice because we look in vain at the prices, the quality of the work, and the end result if the time spent in service is high.
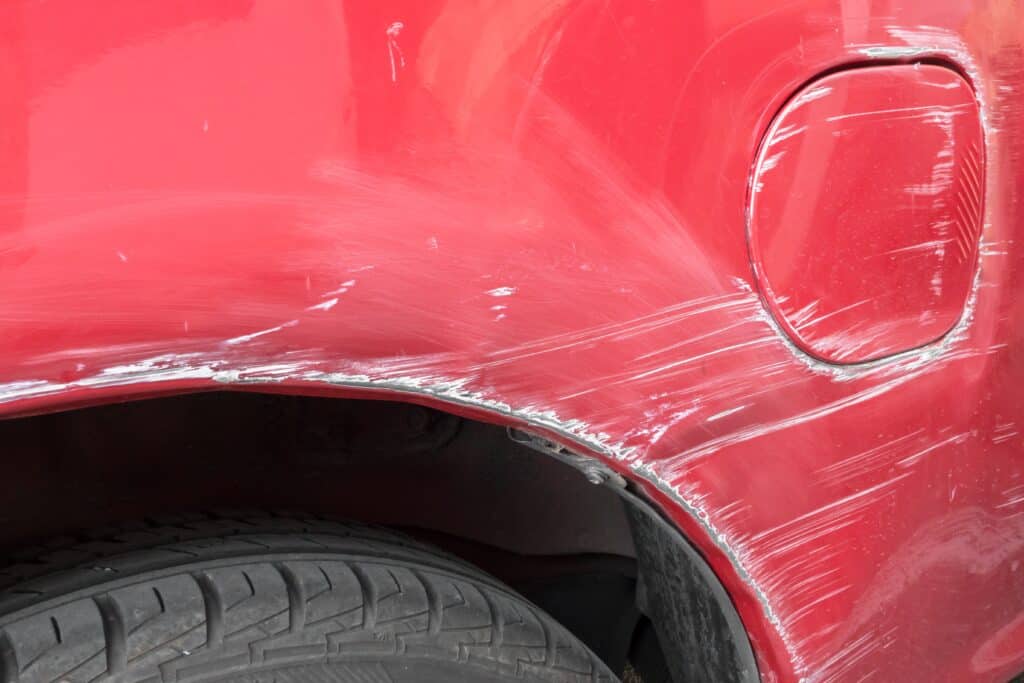
price per painted item
Scratched rear wing

I’ve noticed a tendency lately to ask the first question “how long does it take?” instead of “how much does it cost?” The reason is obvious, we need a car, every day – when we can’t use it makes our commute difficult.

Is the car worth painting complete?

When there are several elements that need to be redone, it is advisable to repaint the whole car. Here the results are much better and there are no differences in color from one element to another, the work being more uniform. Prices have also increased here and start from 3500 lei to 5-6000 lei. If we talk about an SUV, there the price is about 1000 lei higher.


Recommendations for evaluating painting work!

  • Check that the paint is not leaking, or improperly painted.
  • Check for unacceptable hue differences in different light conditions and from different angles.
  • Traces of sanding, paint blisters, pores, or craters in the paint show an improper painting process.
  • Check that the plastic wheel guards have been reinstalled as this would lead to rust + and noise when stones/dirt hit over time.
  • Check that the heat shields next to the engine/drum have been reinstalled – if you notice a smell like burnt paint and do not know from where (they may even be a fire hazard)

Just like 5 years ago, we don’t want you to need the information in this article, but if you have access to these services, it’s important to be careful because improper painting can devalue your car at the time of sale. If there is more important information on this topic, you can fill it out directly on Facebook or right here under the article through comments.

Also, because there will be a lot of questions about pricing for differently painted items, we invite all specialists working in this field to answer readers so that in addition to providing useful information that you provide – you can also gain new customers.

Please let us know what are the prices in your country and what elements you needed painting!


Allergy season is coming – Check the air filter?

0
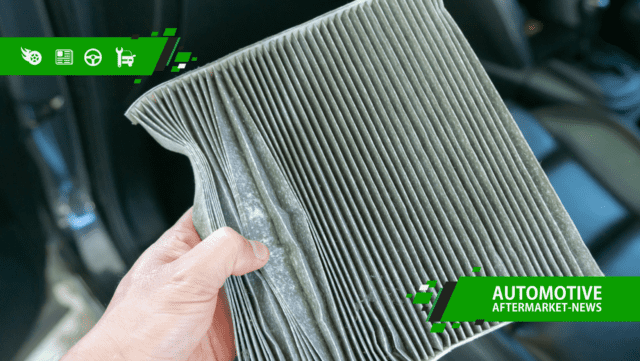
Allergy season is coming - Check the air filter?

The first instinct is to make sure the air filter is clean, if not replaced immediately. However, there are a few more steps you should take. There are also many types of filters on the market – the simple ones filter only large impurities, dust particles, and calamine but do not filter spores and pollen and are not anti-allergenic. So how do we prepare?

  • Clean the inside of the car thoroughly
  • Wipe the dust vents
  • Sanitizes the air conditioning system (ozonation)
  • Replace the cabin filter with an anti-allergic one

What are the options?

There are several types of cabin air filters on the market, from simple ones for impurities to pollen ones that filter out spores and pollen, to activated charcoal filters that neutralize odors, and to antiallergic and antibacterial, which are recommended for people with asthma or severe allergies.

Among the first manufacturers to launch filters that ensure 100% filtration of the air in the passenger compartment were those from MANN FILTER, followed by other manufacturers such as Filtron, Mahle, Bosch, Valeo, Denso, Plan, UFI, Pilenga, Campion, NIPPARTS, Sakura. The price of an anti-allergy filter starts from 15 Euro and can go up to 50 Euro if you choose the OE version from a certain manufacturer.

What are the benefits of an allergy filter?

An anti-allergy filter incorporates all the technologies of the other filters in one place and gives you the best air filtration for the car interior. Thus with the purchase of a single filter, you have the best protection on the market because the filter contains 3 layers:

  1. Particle filtration layer (stops dust and pollen)
  2. Activated carbon coating (removes odors and gases)
  3. Bifunctional layer (fights allergens and bacteria)

3-layer car air filter

How does it protect me?

Being a filter that encompasses all 3 layers means that you and the car’s passengers have the most efficient air filtration. The advantages of the antiallergic filter are:

  • Captures and neutralizes allergens – no cough or stuffy nose
  • Filters toxic substances – diesel particles and other harmful particles
  • Prevents the formation of unpleasant odors – kills bacteriacar anti-allergic antibacterial filter

When do you need to replace it?

The filter is generally replaced depending on how many km you have traveled (with the oil change) but also depending on the operating environment – in a wetter environment, it should be replaced more often. Then we need to pay attention to the following signs:

  • When the windshield gets steamy
  • When unpleasant odors appear in the passenger compartment
  • When you start sneezing in the car

How long to change the passenger compartment filter

In the end, we leave you with a study done by VW which determined that if you sneeze at a speed of 50 km / h you drive about 13 meters without seeing. But at 130 km? Leaving this issue aside, many drivers die each year from problems caused by polluted air (bronchitis, asthma), and more suffer from respiratory illnesses.

The problem is even more serious due to the congestion in the big cities, the fleet of old cars, and also the particles generated by diesel engines. Better safe than sorry.

Have you tested these filters and how much did you notice the differences from a simple filter? Write us your opinion below.

Does manual gearbox need oil change?

0
manual gearbox oil change

A fairly common question among drivers, which often creates  confusion, is “Do you need to change the oil in a manual gearbox? ” There are also debates about the length of time or kilometers at which this exchange takes place. Due to the fact that the automatic gearboxes specify a regular service interval for the automatic gearboxes which includes oil change and special filters, the doubts appear especially in the case of manual ones.

To answer these questions, yes, the oil in the gearbox needs to be changed . Even the manual one.

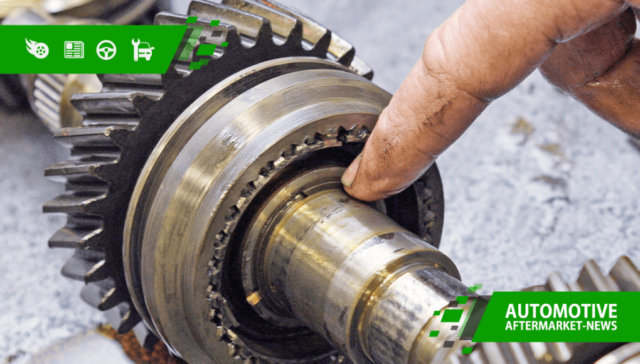
Why? Although the gearbox wear level is much lower than that of the engine, there is still the risk of metal cracking or small splinters coming off the sprockets. These residues contaminate the oil, making it abrasive. Moreover, after a long period of time, the oil naturally loses its lubricating properties. These things lead to accelerated wear of the gearbox components without our realizing it – until it’s too late.

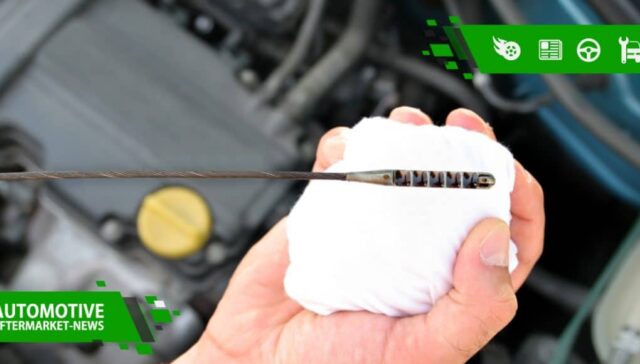
It wouldn’t even ruin a regular checkup.  Why? Even if the oil in the gearbox does not need to be replaced yet, the oil level may be low due to hidden leaks (for example, near planetary gears). Partial or total lack of oil in the can be more harmful than oil that has not changed in time. As the gearbox oil cannot be checked as easily as the engine oil, it is recommended to be checked by a specialist at each overhaul or at most once every two overhauls.

gearbox oil drainWhen does the gearbox oil change?  If the gearbox works properly and there are no unusual noises, the quickest way is to check the user manual of the car. If a certain replacement interval is not specified in the manual, it is best to perform a periodic check and change the oil between 50,000 – 80,000 km or at least once every 2-3 years. Of course, the way the car is used should also be taken into account and the change interval should be adjusted accordingly. There are also some car models were the gearboxes do not require maintenance, but everyone agrees that a “fresh” oil change can only do good, if you plan to keep the car as long as possible. more time.
What type of oil is used? A very important aspect of changing the oil in the gearbox is the use of the correct type of oil, specified by the car manufacturer. Using another type of oil may cause damage or void the warranty. If the oil type is not specified in the machine’s user manual, you can call an online oil selector or specialist based on the engine code or VIN code of the machine.

In conclusion, according to the principle of prevention, if you want to keep a car in perfect condition for as long as possible, one of the things to keep in mind is that the oil in the manual gearbox must be changed at a certain interval even if some people say that it should not be changed or you hear reviews like “I did 200,000 km without changing the oil in the box and it works well”.

See also:
Why does the engine consume oil?
How do we choose engine oil?

Should I replace car light bulbs in pairs?

0
înlocuirea becurilor auto

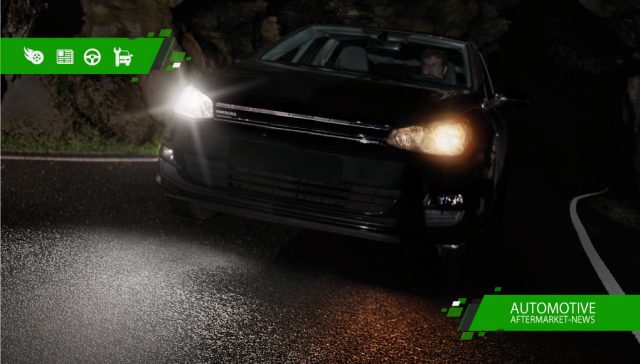
Some drivers consider the recommendation to replace the car bulbs in pairs to be an unnecessary investment. However, the health and even life of all road users can be at stake if small savings are made.

Modern car headlights are designed to improve visibility on the road. The revolutionary patent was the idea of ​​the Philips brand, which introduced xenon bulbs for series production (on the BMW 7 Series models from 1991). Nowadays, more and more new cars are equipped with bulbs that are based on LED technology and even laser diodes (more on the development of light sources: link ).

However, cars that use old models of headlights and halogen bulbs are still mostly on the road. Their drivers often face a dilemma: to replace one light bulb witch is burned or both bulbs, including the light bulb that is still working. The answer is always the same: headlight bulbs should always be replaced in pairs. Why?

Each item is characterized by a certain technical lifespan. This is not always the same, but in the case of a pair of light bulbs, it can be assumed that when one burns, the other is also nearing the end of its life. In this situation, the driver must restore the efficiency of car bulbs, which is not a simple task for current models. In addition, the replacement of the bulbs may require the removal of the protective covers from the engine compartment and even the wheel spring covers. Efforts for this task will need to be repeated soon. And that’s not all.

“As it works, the halogen bulbs lose their lighting parameters. As a result, not only the lighting intensity decreases, but also the length of the light beam that falls on the road – ”says Wioletta Pasionek, Marketing Manager for Central Europe at Lumileds Poland, Philips’ only licensed manufacturer and distributor of car bulbs.

When replacing light bulbs, remember a few important principles. First of all, the light bulb should not be touched with bare fingers. Traces on the glass can lead to distortion of the light beam. Second, new light bulbs must be installed correctly. Reversing the position of the filament can lead to incorrect light reflection in the direction of the road, to the side of the road or even to the sky, leaving key areas in the dark. Thirdly, the structure of the headlight is adapted to the traffic on the left or right side, which means the asymmetry of the light beam – shorter at the axis of the road and longer at the sidewalk. This distribution allows the driver to obtain an optimal field of vision and, on the other hand, does not blind the other traffic participants. Replacing a single bulb does not allow these requirements to be met. Something else?

“After replacing the bulbs, the headlights must be adjusted accordingly. Even a small deviation can lead to blinding of other road users “- adds Wioletta Pasionek from Lumileds Poland -” It must be remembered that vision deteriorates with age. According to specialist research, every 12 years, our ability to cope with blinding light decreases by up to 50% ”.

The last argument for replacing bulbs in pairs is their version and manufacturer. We don’t always remember if we last installed a traditional light bulb or a version with a longer or more intense light beam. The use of different products with different specifications will further increase the disproportion of lighting properties and therefore reduce the level of road safety.

It is recommended to choose known car bulb manufacturers. They guarantee the use of high quality materials and the accuracy of performance specified in the applicable standards and approvals. In addition, it affects the life of light bulbs and therefore their frequency of replacement.

Why does the engine burns oil? Tell us your experience!

0
what causes oil burn

Today we talk about a topic in a more interactive format about some problems with the engine that lead to oil consumption/burn. We will make a list and suggest that you share your experience with us either here or on the Facebook page and we will periodically complete the article with suggestions that seem relevant to us. When giving us feedback, it is important to mention the car model, engine, year, km and the cause you have discovered regarding the oil consumption / loss of your engine.

Therefore, here are the reasons for oil burn/consumption, by categories:

Errors

  • wrong oil for your engine
  • oil change is very important. The deadline indicated by the manufacturer must not be exceeded. Also you must consider how is the engine operating. An engine that was used more aggressively needs an oil with high temperature tolerances and it must be changed more often (the burn oil becomes more thinner and starts to deposit on the moving parts).
  • missing oil cap
  • wrong segment alignment (rare cases)
  • Counterfeit or poor quality oils
  • Type of fuel used: a fuel with a higher octane / cetane number can cause oil consumption

Wear

  • segments or cylinder walls  wear(white smoke from the exhaust until engine warms up)
  • used turbine bearing (emits bluish-gray smoke at start-up)
  • wear of engine gaskets
  • used turbine ( see here how to prevent turbine wear )
  • oil seals on valves are “baked”, it is known that the plastic in them yields faster than the segments
  • cylinders may be worn; the diagnosis can be established exactly after a compression check
  • Turbocharger losses pressure (damaged hoses)

Leakage

  • oil pan (sump) is leaking
  • engine gasket are broken
  • oil filter cracked / missing gasket from the oil filter
  • worn EGR valve

As mentioned at the beginning of the article, leave us a comment with your experience and how you found the solution, either on the article or on Facebook and we will make sure that the list will be filled to be useful to drivers facing this problem.

How to prevent turbocharger wear?

0
How do we prevent turbocharger wear?

If you have Turbocharger equipped engine, here are 5 things you can do to help reduce the cost of reconditioning or replacing your turbocharger. Very few people know that the most important factor that influences the life of the turbo is the driver himself, so we hope that this article will help you.

So let’s start the list!

  1. The first aspect is the ENGINE OIL . You must know that the oil reaches the turbo, where it lubricates all the moving parts. It is very important, to choose the right oil, with the right specifications for your engine and to change the oil on time. In fact, some drivers change the engine oil faster than the manufacturer indicates (for prevention). We don’t insist on oil anymore – there are already several articles discussing on what exactly leads to increased oil consumption .
  2. ENGINE HEATING – also depends on optimal lubrication. Don’t accelerate immediately after starting the engine; it takes 5-10 seconds for the oil to be distributed from the engine to the turbocharger. Moreover, when it is cold, the oil also needs to be hot to ensure optimal lubrication. Bottom line: try to refrain from going “fast” as soon as you start the engine, but let it idle for at least 10 seconds, then start moving without  powerful acceleration until the engine and oil touch optimum working temperature.
  3. TURBOCHARGER COOLING is just as important . Long round trips with strong acceleration can heat up the turbine components so much that the oil starts to boil. Sudden shutdown of the engine in this situation leads to the formation of residues and carbon deposits in the turbocharger. So, when you stop, let the engine idle for a while until you gather your things, your phones, to allow time for the oil to circulate and the temperature in the turbo to drop. In this way, you also prevent the physical damage of the turbine components, in addition to avoiding the deposition of residues.
  4. Perhaps the most important aspect, is that drivers OVERSTRESS the TURBOCHARGER. When you drive in high gear and slow down (low RPM), the turbine is forced, which, in time, will damage it. Try using the gearbox effectively and use a lower gear when you overtake or climb a hill.
  5. Regarding maintenance, it is also recommended to “FORCE THE TURBOCHARGER ” after a period in which there was a lot of traffic at low speeds (usually in the city), going out on the highway that allows acceleration up to 4-5000 RPM for 10-15 seconds, reducing the calamine and deposits inside the turbine. Be careful! The engine and oil must be at optimum operating temperature before doing so.

However, if you are having problems with your turbine, we recommend that you contact a professional refurbishment and repair center to prevent the complete destruction of the turbocharger

We will not go into other more technical aspects, because we consider this are the most important for you to know. We look forward to see what is your experience regarding car turbochargers so we encourage every one to tell us in the comment section.

Did the engine water pump fail?

0
water pump

The role of the water pump and when to change it

The purpose of the pump is to circulate the engine coolant to maintain the correct operating temperature (cool the engine). The principle is simple, the rotational movement of the pallets positioned obliquely pushes the coolant into the engine and into the entire cooling assembly. In the classic version, the water pump is driven by the movement of the crankshaft.

distribution water pump

Usually the water pump changes at intervals when the timing belts is replaced. There are other cases when it fails ahead of time, but there are other factors involved. If the water pump is gone, you have to tow the car, you have to disassemble the timing belt again, change the pump and then pay for the labor twice !!!!!!!!

The water pump has been designed to operate and last as long as the life of the car distribution belt. If your car has a belt change of 60,000 or 90,000 km then the water pump must be replaced with the timing belt, tension rollers, guide rollers or accessory belt.

Types of water pumps and fittings

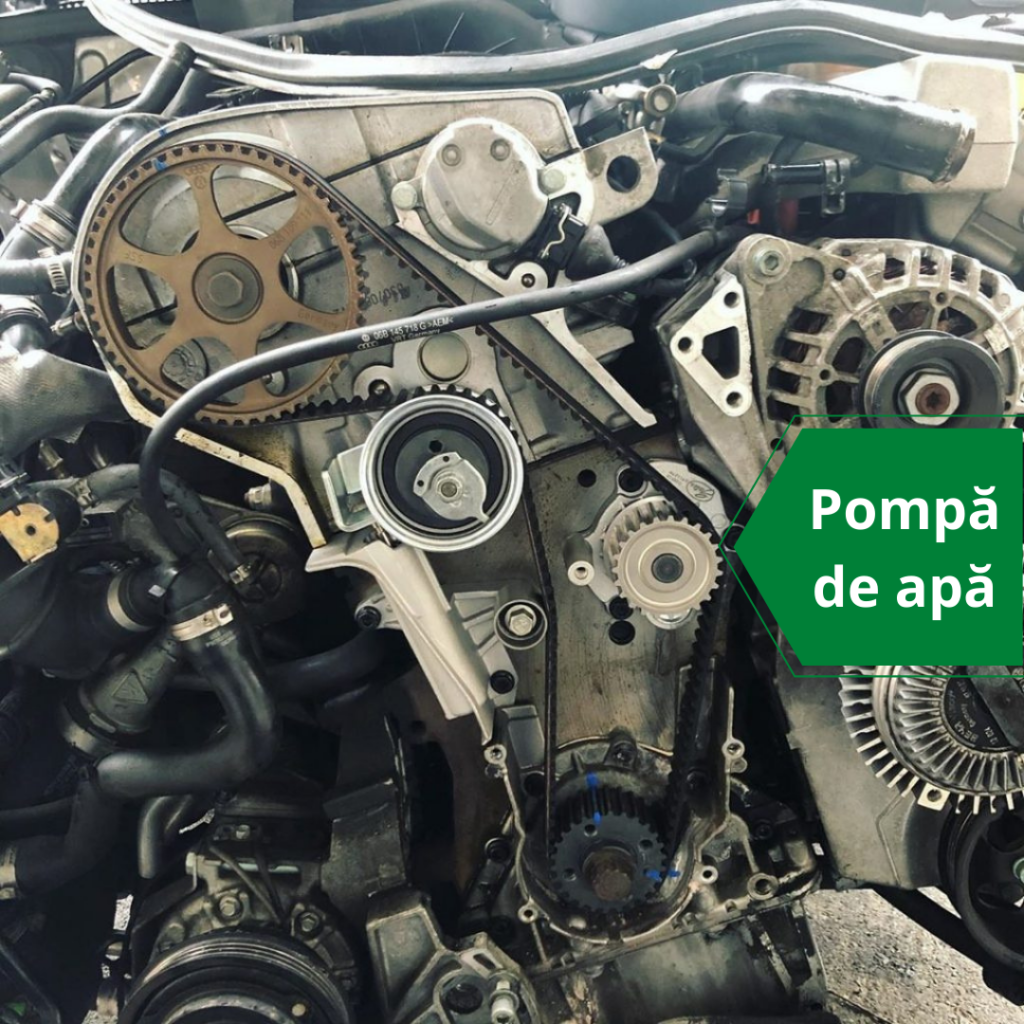
Generally, the mechanically operated water pump is mounted in the middle – lower part of the engine. The movement of the pump is given by the timing belt or by the accessory belt for the cars that have timing chain.

where is the engine water pump

For Start / Stop or Hybrid cars, the water pump may only be electric. In addition to the mechanical pump, we also find a electrically operated one, which, when the engine is switched off, still provides cooling. On some cars the electric pump is positioned near the expansion vessel. For electric cars, the water pump is only electrically operated so that it can better control the temperature of the battery pack and the engine.

What parts may fail on water pump?

Like many mechanical parts, the water pump tends to wear out. Wear can be exacerbated if there is only water instead of antifreeze, the antifreeze level is too low or there are impurities in the coolant. See below what might fail:

  • The bearing may break
  • The rotor or clamp may break
  • Shaft play caused by wear
  • Antifreeze infiltration on the bearing
  • Rust or impurities that destroy the blades

What are the symptoms of a faulty pump?

The pump usually shows signs of failure when it makes strange  noises or has small leaks. If you notice any signs, go to the first service. Other symptoms include:

  • Rapid rise in engine temperature (thermostat may be blocked)
  • No heating inside the car
  • Leaking antifreeze around the water pump until the system is empty
  • Permanent sounds in the form of buzzing
  • Timing belt vibration from the shaft being lose

ATTENTION!
There have been cases where the water pump shaft failed to actuate the timing belt, causing the belt to slip off the camshaft and stall the engine! Don’t save money where it’s not worth it.

To prevent water pump damage, it is advisable to use quality antifreeze, in no case only distilled water. Always make sure you have a proper level of fluid level between the minimum and maximum. Make sure there are no leaks or other elements in the cooling system to keep it permanently clean – this can be most easily seen in the expansion vessel.

What are the manufacturers and what are the prices?

The most important aftermarket manufacturers are: ContiTech (Continental), MAHLE, HELLA, Valeo, MagnetiMarelli, Gates, SKF, Bosch, HEPU. They all offer quality products and the prices start at 30 €  and can go up to 180 € for a water pump. Distribution packages are now available which, in addition to the timing belt, have included in the package all the accessories that need to be replaced: tension rollers, guide rollers, oil, filters and antifreeze.

WHICH MANUFACTURER DID YOU CHOOSE WHEN YOU CHANGED THE WATER PUMP?

Don’t waste hours with a locked bolt!

0
Don't waste hours with a locked screw!

The most annoying thing is that you can’t do your job because you can’t unscrew one or more stiff screws and nuts. Of course you can use force, pull on them, just like I did and it was enough to break and get stuck in the engine. That was not the only problem. Thus, a simple matter that lasted 10 minutes turned into a half-day job. Shall I say that the extractor also broke in the hole in the screw? BAD LUCK

I am convinced that we have all heard of all sorts of solutions on the internet such as rust-melting sprays, WD 40 that promises to unlock stiffened assemblies or the use of a pneumatic hammer to knock it open. When nothing works, what can you do? Don’t despair! There is a better solution!

Why does this blockage occur and the metal fails?

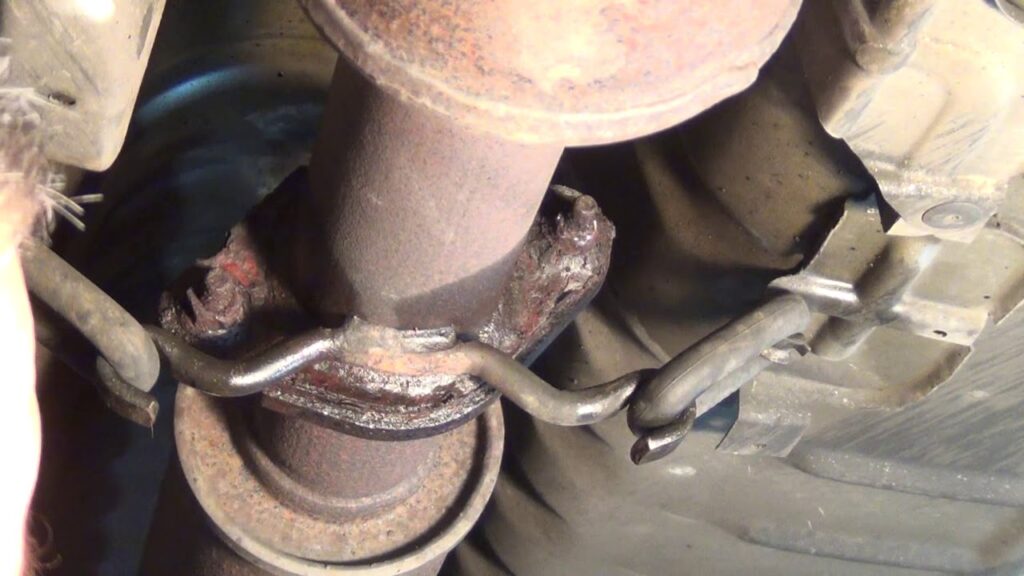
As time passes and due to the exploitation conditions and the action of oxygen or water combined with salt in winter, the metal oxidizes and thus corrosion occurs. Rust is formed on all surfaces of the metal and thus, in addition to weakening the ferrous factors, it also blocks the mechanical friction between the surfaces.

Another reason for blocked bolts or nuts is due to the very high temperature of the assembly which often welds the surfaces. This can make it almost impossible to unhook without heating the surfaces.

stiffened exhaust screws

What can be the solution to get rid of the blockage?

If they do not come loose, my advice is not to force them if you want to have a chance to unscrew the bolt without breaking it. When all of the solutions have failed, heating is recommended as an alternative, which we also advice. Until now, many people used a burner, but such a measure can affect other parts around them and can melt rubber or plastic, which is very expensive to replace. This allows you to get rid of all the problems and time lost in such a procedure with a screw induction heater .

Red induction heating screw

This heater for locking parts that are rusty or seized can be used for any metal part such as bolts, nuts, pivots, steering rods, locking bearings, fasteners, door hinges, exhaust manifold bolts, lamda (O2) sensors, studs, etc.

How does it work and what is the advantage?

The principle of operation is similar to that of an electric induction hobs. The device works on the basis of electricity and with the help of a coil it creates a variable magnetic field that heats the part in a few seconds to over 200 ° C. Due to the thermal expansion phenomenon, the screw and the metal, respectively, expand, making it easy to unscrew.

The advantage is that using this method reduces the risk of breaking the bolts or screw that you later need to replace. Also, an induction heater only affects the metal bolt without affecting other surrounding parts, so you can work in confined spaces. Also you eliminate the risk in case the screw fails and you have to use other kits to remove it, and… another wasted time.

What does such a kit contain and what is the purchase cost?

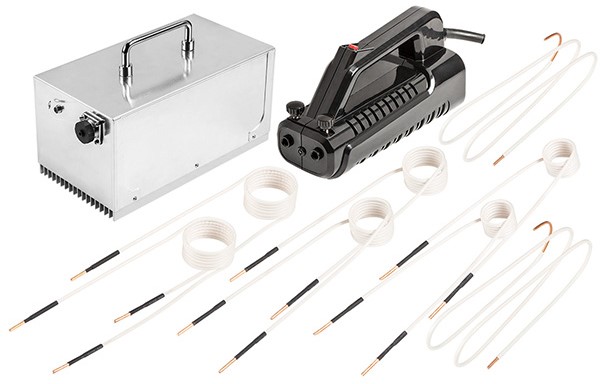
A complete kit that can be used for all locked metal parts contains:

  • Induction heater
  • End for coil attachment
  • Screw coil Ø10-22 mm: Temperature 300 ° C – 572 ° F: Heating time 20-25 s
  • Coil for Ø23-28 mm: Temperature 300 ° C – 572 ° F: Heating time 25-30 s
  • Screw coil Ø29-36 mm: Temperature 300 ° C – 572 ° F: Heating time 30-40 s
  • Screw coil Ø37-40 mm: Temperature 300 ° C – 572 ° F: Heating time 45-50 s
  • Flat induction coil
  • Shapeless induction coil that can be molded depending on the part, for heating large components such as bearings, rims, etc.
  • Sturdy suitcase-type kit for storage and transportMetal parts induction heater kit

The price for such a kit can start from 400 € for a kit with several elements and can reach up to 800 € for those that have a more complete applicability. You can see, for example, a kit that contains all the above elements to make an opinion, but you can find other examples on the internet.

In conclusion, whether you are working in a tire replacement shop, service, other fields with a more special profile or you are just a mechanical enthusiast, you can take advantage of such a kit to make your work easier and thus reduce any associated risk.

The rubber boot for drive shaft – is in good condition?

0
rubber boot for drive shaft - is in good condition?

This item easily falls into the category of spare parts, the rubber boot being a cheap piece with a role that deserves attention. The cost of not replacing this cheap rubber boot could be higher because in time the drive shaft will fail and the cost will be 30 times higher.

Sometimes they warn you when changing tires that you have a broken rubber boot and that it should be changed. You can already consider yourself lucky, maybe it saved you a lot of money. There are others who ignore the beating sound or find out too late – maybe even when their car breaks down. So what is the risk?

What are the symptoms?

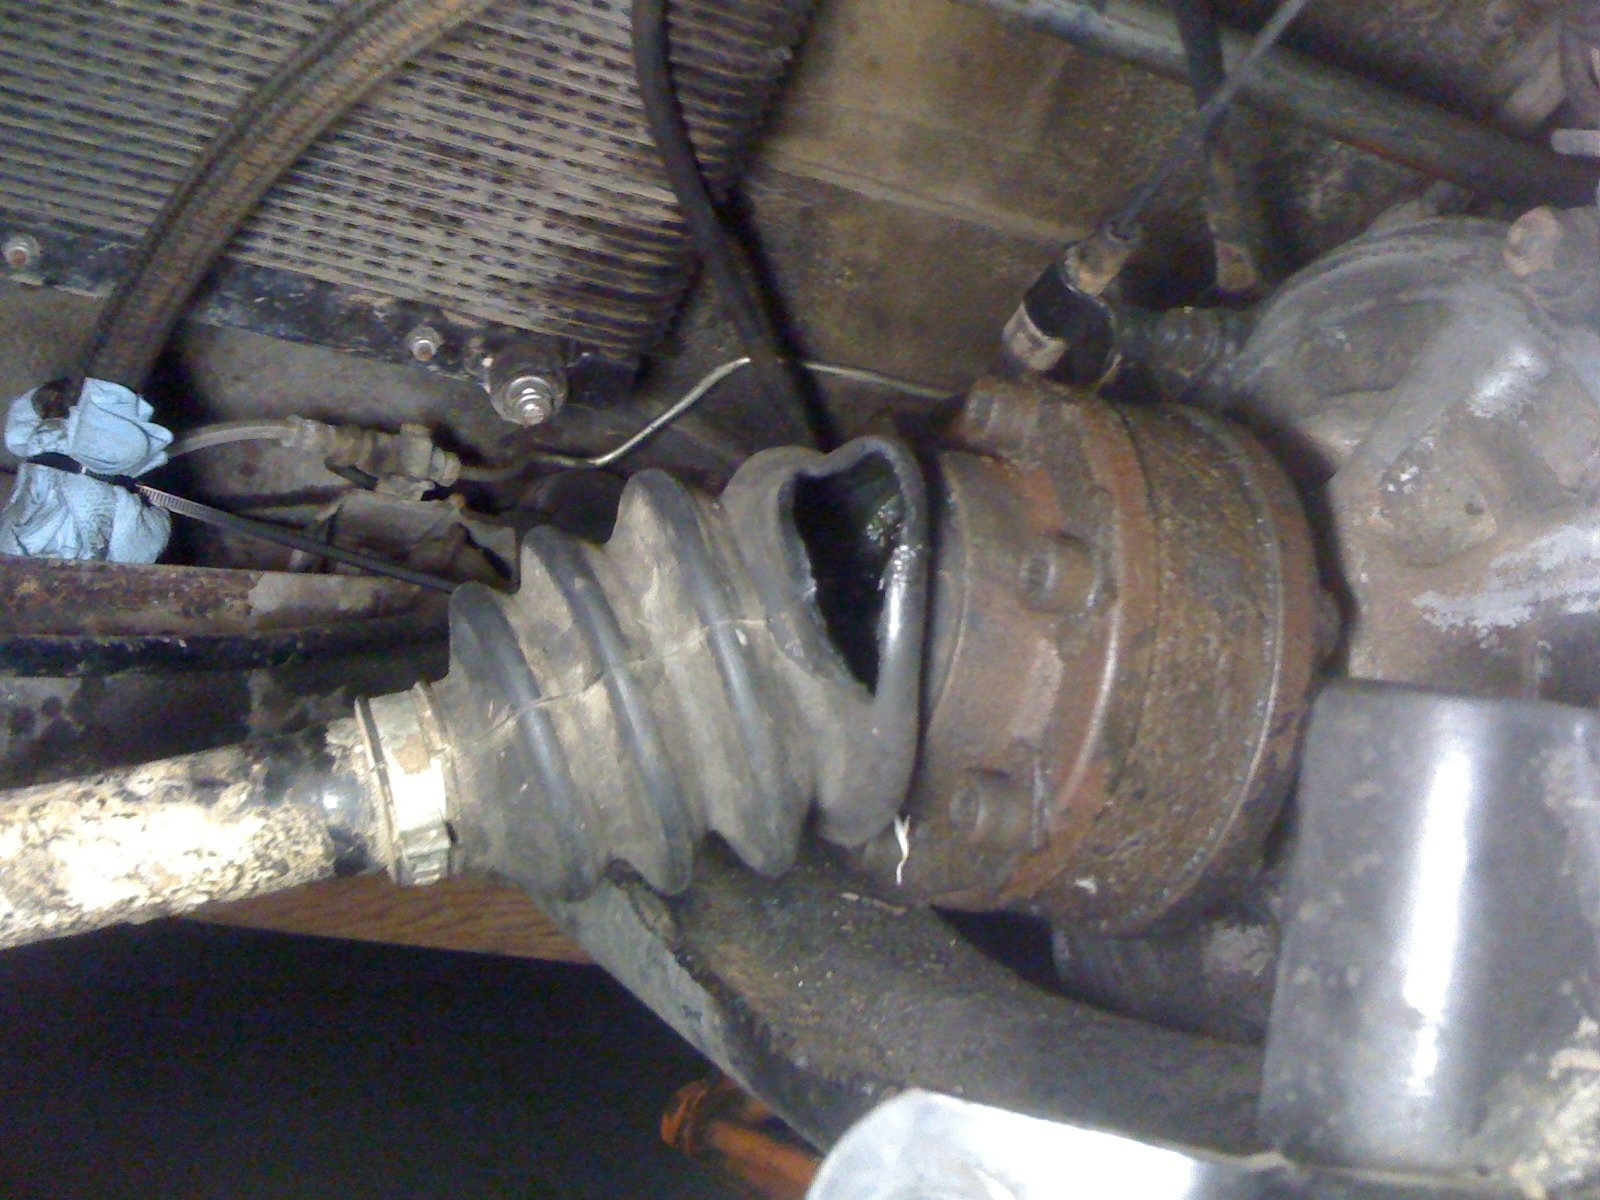
Of course there are signs which indicate when the rubber boot is “finished”, some of them are visible, whereas others can be heard from the inside of the car. The first signs can be seen on the wheel plastic guard, on the rim, on the tire, on the inner arm, on the elements of the braking system, or even where you parked the car like grease / grease stains. The stains remain even after you go to the car-wash or reappear, so it’s kind of hard to ignore.

When there is no more Vaseline in the rubber boot, you can hear the drive shaft spins  without lubrication, metal on metal. In time, dirt, water, salt from the road will get in and the drive shaft will fail and you must replace it.

In this case, you can no longer drive the car because one of the drive shafts gears is no longer connected to the wheel. You must tow the car in order to be replaced!

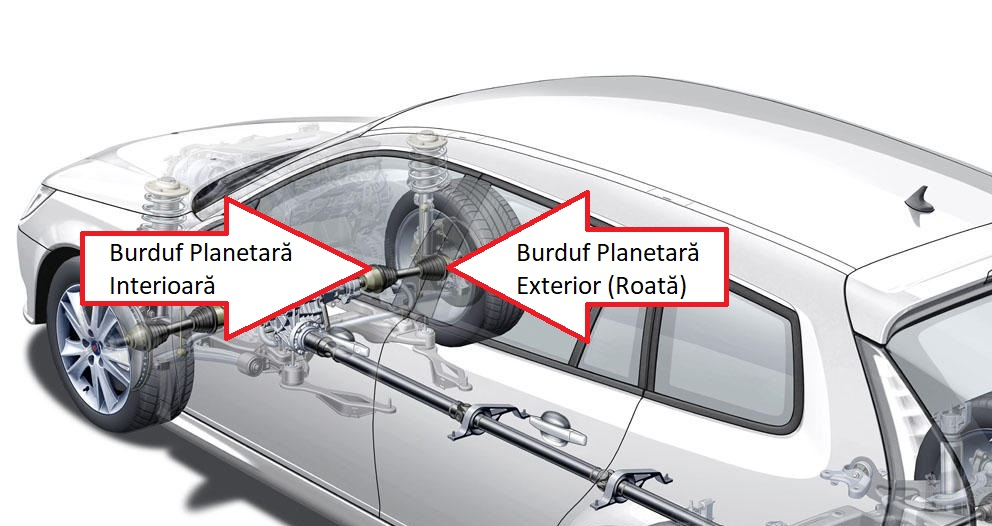
What is the rubber boot on the planet?

As a construction is a piece of rubber, plastic or newer silicone. Its role is to seal the drive shaft head from dirt / moisture and at the same time to ensure the lubrication of the drive shaft head. A drive shaft gear consists of a shaft with two ends and a rubber boot mounted on each end. On single-axle cars you will find two drive shaft gears and on 4 × 4s you will find 4 drive shaft gears, one for each wheel.

There are several reasons why a rubber boot is destroyed:

  • The rubber “bakes” over time
  • Because of the stones that hits the rubber boot it cuts / breaks it
  • Due to overload on corners it breaks
  • Too long operating period
  • The manufacturing material is of poor quality
  • Improper mounting of the collar – detaches from the rubber boot
  • Maximum extent until it detaches from the planetary head

What is the exchange interval and when should it be checked?

I also heard from some that they didn’t change the bellows even after 300,000 km and that it was “still working”, but here we have to take in consideration the operating conditions and the condition of the road. We cannot compare one example with another, but for countries with bad roads the exchange period falls between 100.000 and 200,000 km, there are also cases in which the exchange was made even after 10.000 km. There are many factors to consider here. Check their condition every time you arrive by car in repair shop / tire shop. You can also do this in the parking lot – turning the wheels to the maximum in one direction and then in the other, so you can inspect the situation.

How much does it cost, how long does it take and who are the producers?
As I said above, the purchase costs for a rubber boot are quite low. The kit contains the rubber boot, vaseline, nut and clamps and the price starts from 5 € and goes up to 50 € . This is a cheep part if we compare the cost of a drive shaft that starts from 100 € and can reach up to 600 € . You have to make an appointment at the auto repair shop, maybe even leave the car all day if you need to change the rubber boot from the gearbox.

Our recommendation is to choose a better quality bellows, so you can avoid frequent repairs. The best known manufacturers are SPIDAN, SASIC, NTN, FEBI, SWAG, TOPRAN, LOBRO.

Global launch of Nokian Hakkapeliitta R5 tires

0
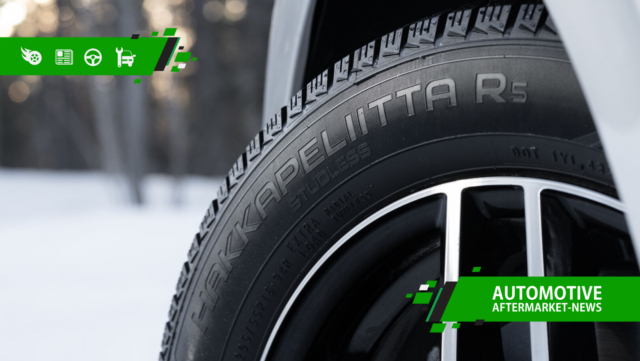
Nokian Tires, the world's leading winter tire manufacturer, has launched a product showcasing its latest tires. We have to admit that the progress is quite significant, and a lot of technology has been invested in the new tires to reach this level.

Nokian Tires, the world’s leading winter tire manufacturer, has launched a product showcasing its latest tires. We have to admit that the progress is quite significant, and a lot of technology has been invested in the new tires to reach this level.

Hakkapeliitta R5 passenger car and R5 SUV tires are the newest tires in the manufacturer’s range and have been designed from the ground up with some features for maximum safety in winter. They have also launched the Hakkapeliitta R5 EV, a tire dedicated to Electric and Hybrid vehicles that offers ice grip, comfort and eco-friendly driving functions.

The new Hakkapeliitta R5 product line comes with a comprehensive selection of over 160 products ranging in size from 14 to 22 inches, Hakkapeliitta R5 are available in speed categories Q (160 km / h), R (170 km / h) and T (190 km / h). Most products are XL marked with the highest possible load capacity in that size. The tire selection will be available to customers this fall .

tire Nokian Hakkapeliitta r5

The main innovations that have been applied to these tires can be read below:
  • Double Block Grip – Superior grip and handling – The new two-block structure ensures maximum grip on slippery winter surfaces.
  • Arctic Grip Crystals – Grip on ice – Third-generation microscopic grip crystals are integrated into the tread rubber and serve as built-in targets, creating sharp, hard grip edges inside the rubber. As the tire wears out, the crystals come into play and offer a welcome grip.
  • 3D Lock Slots – Accurate and Predictable Maneuverability – Self-locking 3D slots press the tread blocks into contact with the road, which improves maneuverability during cornering and lane changes.
  • Green Trace – Safer and more environmentally friendly – Excellent winter grip at all temperatures, excellent mileage and low rolling resistance. The large amount of natural rubber keeps the compound flexible in all conditions. More than a third of the materials are renewable and recycled.
  • SilentDrive technology – Maximum comfort – Exceptionally low noise is achieved by adding a layer of acoustic foam to the inner lining of the tire. Acoustic foam absorbs resonance from the air cavity of the tire, resulting in lower noise levels and increased driving comfort. This technology is applied to the Hakkapeliitta R5 EV range.
  • Silent Touch design – Comfortable and pleasant ride – The improved comfort features of the Hakkapeliitta R5 have been achieved by eliminating the most annoying noises.
  • Aramid Sidewall Technology – Durability and Surprise Protection – The sidewall composite is extremely durable and puncture resistant and contains extremely strong aramid fibers. The same material is used in the aerospace and defense industry. Aramid fibers strengthen the sidewall rubber to withstand external impacts and wheel flange pressures. This technology is applied to the Hakkapeliitta R5 SUV range.

What caught our attention was the patented Winter Safety Indicator (WSI) in the tread, which further improves safety. It displays the remaining tread in millimeters, and the snowflake symbol remains visible to a depth of four millimeters of the tread. Once the snowflake has worn out, it is recommended to purchase new winter tires to ensure safe driving.

We can’t wait to test the new tires on all road conditions in Romania and come back with an article for you.

FOR FULL INFORMATION WE INVITE YOU TO THE MANUFACTURER’S SITE – https://www.nokiantyres.com/winter-tires/nokian-tyres-hakkapeliitta-r5/